Ceiling cracks, while often minor, can detract from your home’s appearance and, in some cases, signal underlying issues. Fortunately, Menards ceiling patch crack repair products make it easy to address these imperfections, restoring your ceiling to its original condition. Whether you’re dealing with hairline cracks or slightly larger ones, Menards offers a range of high-quality tools and materials to help you achieve professional results. This guide provides a detailed, step-by-step approach to Menards ceiling patch crack repair, ensuring your repairs are seamless and long-lasting.
Understanding Ceiling Cracks
Ceiling cracks can arise from various causes, and understanding their origin is key to effective repair:
- Settling of the House: New homes often settle, causing minor cracks as the foundation adjusts.
- Temperature and Humidity Changes: Seasonal fluctuations can cause materials to expand and contract, leading to cracks.
- Poor Installation: Improperly installed drywall may develop cracks over time.
- Water Damage: Leaks from roofs or pipes can weaken ceilings, resulting in cracks.
- Structural Issues: In rare cases, cracks may indicate more serious problems, such as foundation shifts.
Most ceiling cracks in residential homes are cosmetic and can be addressed with Menards ceiling patch crack repair products. However, if cracks are wide, deepening, or accompanied by sagging or water stains, it’s wise to consult a professional to rule out structural concerns.
Assessing the Damage
Before beginning your Menards ceiling patch crack repair, assess the crack to determine the best approach:
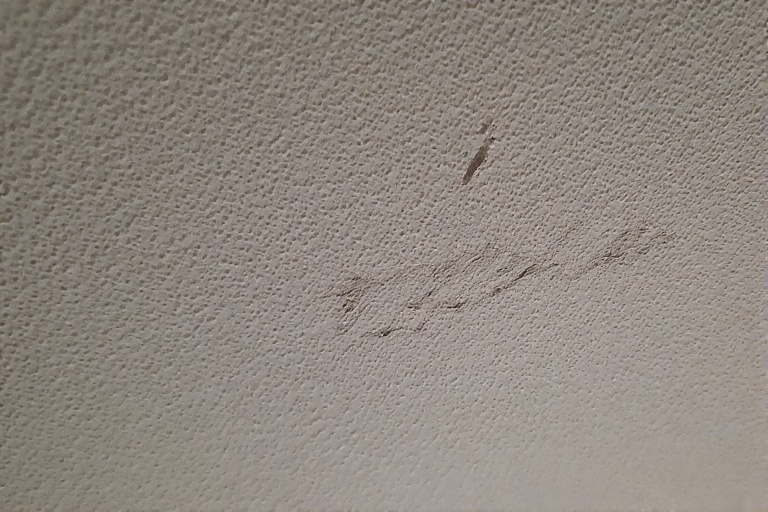
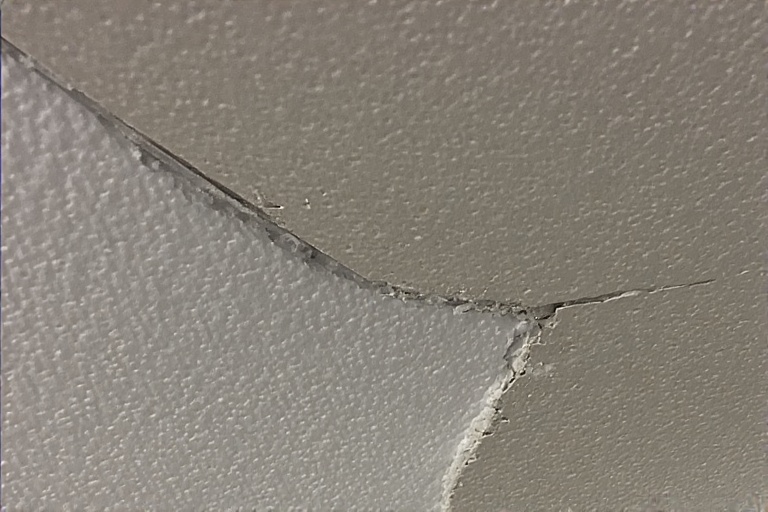
- Size: Hairline cracks are typically cosmetic and easy to fix with joint compound or texture patches. Larger cracks may require drywall patches.
- Location: Cracks near windows, doors, or corners may result from settling or minor movement.
- Pattern: A single crack is usually less concerning than multiple cracks or a pattern suggesting ongoing structural movement.
If you’re uncertain about the crack’s severity, consider professional evaluation. For most small to medium-sized cracks, Menards ceiling patch crack repair products are sufficient for a DIY fix.
Tools and Materials Needed
To perform a successful Menards ceiling patch crack repair, gather the following:
| Category | Item | Purpose |
| Tools | Putty knife | Applying and smoothing joint compound or texture patch |
| Fine-grit sandpaper | Smoothing dried repair materials | |
| Paintbrush or roller | Painting the repaired area | |
| Drop cloth | Protecting floors and furniture | |
| Masking tape | Protecting surrounding areas from paint | |
| Materials | Joint compound (e.g., SHEETROCK® Plus 3® from Menards) | Filling cracks on smooth ceilings |
| Texture patch (e.g., Homax® Popcorn Ceiling Texture Patch from Menards) | Matching textured ceilings | |
| Drywall repair patches (e.g., SHEETROCK® Drywall & Ceiling Repair Clips) | Repairing larger holes or cracks | |
| Primer | Ensuring paint adhesion and uniform finish | |
| Ceiling paint | Matching the existing ceiling color |
Menards offers a wide selection of these products, including specialized items like Homax® Popcorn Ceiling Texture Patch for textured ceilings and SHEETROCK® joint compound for smooth, professional finishes.
Step-by-Step Guide to Menards Ceiling Patch Crack Repair
Follow these steps to repair ceiling cracks using Menards ceiling patch crack repair products:
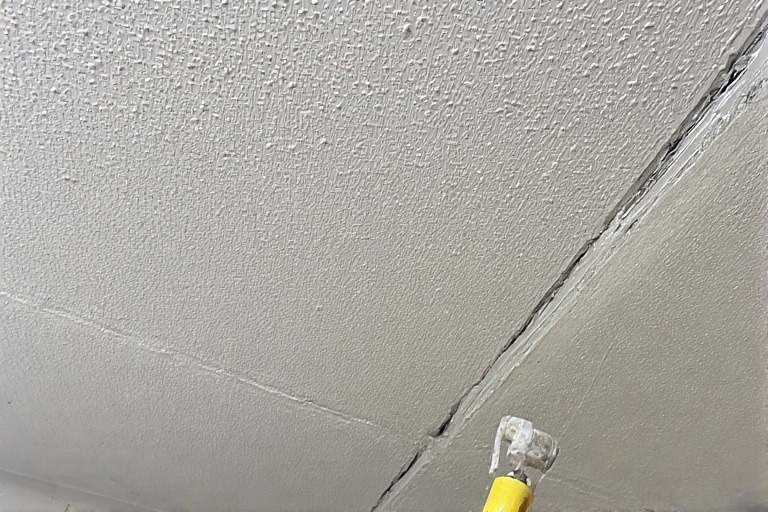
Step 1: Prepare the Area
- Clean the Crack: Use a damp cloth to remove dust, debris, and loose material from the crack. This ensures proper adhesion of the repair materials.
- For Larger Cracks: If the crack is wide or deep, cut out the damaged area using a utility knife and patch it with a drywall piece. Menards offers drywall repair patches, such as SHEETROCK® Drywall & Ceiling Repair Clips, for this purpose.
Step 2: Apply Joint Compound (for Non-Textured Ceilings)
- Use a putty knife to apply joint compound (e.g., SHEETROCK® Plus 3® from Menards) directly into the crack.
- Spread the compound evenly, feathering the edges to blend with the surrounding ceiling.
- Allow it to dry completely, which may take several hours depending on the product and environmental conditions.
Step 3: For Textured Ceilings
- If your ceiling has a texture, such as popcorn or orange peel, use a texture-specific product like Homax® Popcorn Ceiling Texture Patch, available at Menards.
- Follow the product instructions to apply the texture patch over the repaired area, ensuring it blends seamlessly with the existing texture.
Step 4: Sand and Smooth
- Once the joint compound or texture patch is dry, sand the area lightly with fine-grit sandpaper until it’s smooth and level with the ceiling.
- Wipe away any dust with a damp cloth to prepare for painting.
Step 5: Paint
- Apply a primer if the repaired area doesn’t match the existing ceiling color or if you’re covering stains.
- Paint the area with ceiling paint that matches the rest of the ceiling, using a brush or roller for an even finish.
Preventing Future Ceiling Cracks
To reduce the likelihood of future cracks and minimize the need for Menards ceiling patch crack repair:
- Maintain Stable Humidity Levels: Use a dehumidifier or humidifier to keep indoor humidity consistent, preventing material expansion and contraction.
- Check for Water Leaks: Regularly inspect your roof, pipes, and ceilings for signs of water damage and address leaks promptly.
- Ensure Proper Installation: During renovations, ensure drywall is installed correctly to avoid future cracks.
- Monitor Cracks: Keep an eye on existing cracks to detect any widening or new cracks, which could indicate underlying issues.
FAQs About Menards Ceiling Patch Crack Repair
Q1: Can I use regular spackling instead of joint compound for ceiling crack repair?
A1: While spackling can work for very small cracks, joint compound, such as SHEETROCK® Plus 3® from Menards, is better for ceilings because it’s easier to sand and less likely to shrink.
Q2: How do I match the texture on my ceiling after repairing a crack?
A2: For textured ceilings, use a product like Homax® Popcorn Ceiling Texture Patch from Menards. It’s designed to blend seamlessly with existing textures, ensuring an invisible repair.
Q3: Is it necessary to prime before painting the repaired area?
A3: Priming is recommended, especially if the repaired area doesn’t match the ceiling color or if you’re covering stains. It ensures better paint adhesion and a uniform finish.
Q4: How long does the Menards ceiling patch crack repair process take?
A4: Drying times vary, but joint compound typically takes several hours to dry between coats. The entire process may take one to two days, depending on the crack’s size and complexity.
Q5: Can I repair large cracks myself using Menards ceiling patch crack repair products?
A5: Small to medium-sized cracks can be repaired with Menards products. However, for large cracks or those indicating structural issues, consult a professional to ensure safety and proper repair.
Conclusion
Menards ceiling patch crack repair is a practical and effective solution for restoring your home’s ceilings. With high-quality products like Homax® Popcorn Ceiling Texture Patch and SHEETROCK® joint compound, Menards makes it easy to achieve professional results. By understanding the causes of ceiling cracks, assessing the damage, and following a clear repair process, you can maintain the beauty and integrity of your home. Timely repairs not only enhance your ceiling’s appearance but also prevent minor issues from becoming major problems. Visit Menards for all your ceiling patch crack repair needs and tackle your project with confidence.